
15 DIY Home Projects That Parents Regret Starting and How to Avoid Common Mistakes
Taking on DIY home projects can feel rewarding, especially when you’re trying to improve your living space for your family. But sometimes, what seems like a fun or simple idea can turn into a bigger challenge than expected.
This article highlights common DIY projects that parents often regret starting, helping you avoid those same frustrations. Understanding these pitfalls early on can save you time, money, and stress as you plan your next home improvement.
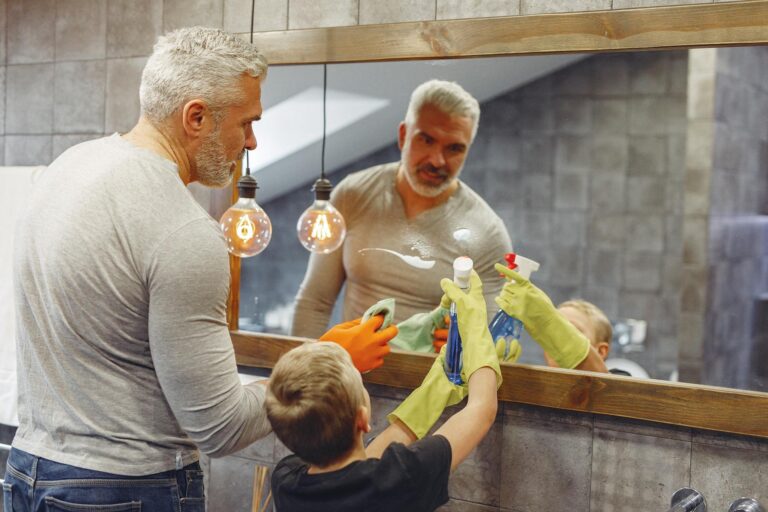
Bathroom remodels that reveal unexpected plumbing issues
When you start a bathroom remodel on your own, you might not expect plumbing surprises. Often, removing old fixtures exposes leaks, corroded pipes, or outdated plumbing that needs replacing.
These hidden issues can delay your project and increase costs. You might find yourself spending more time fixing plumbing than working on the design.
Without professional knowledge, it’s easy to miss critical plumbing requirements. Small mistakes can lead to water damage or mold later on, which costs even more to repair.
Many homeowners regret not consulting experts before tackling plumbing. Learning about common pitfalls in DIY bathroom remodels can save you frustration and expense. You can find advice about these challenges at sites discussing the pitfalls of DIY bathroom remodels.
If your remodel uncovers unexpected plumbing problems, consider whether seeking professional help could prevent bigger headaches. Your time and stress levels might benefit from a helping hand.
Installing hardwood floors without professional sanding
If you decide to install hardwood floors yourself, skipping professional sanding can seem like a time-saver. However, sanding is crucial for a smooth, even surface. Without it, your floors might end up with rough patches or uneven stains.
You may find that the finish doesn’t adhere well or looks blotchy. This can affect the overall appearance and durability of your floors. Some homeowners regret not hiring an expert when it came to sanding and finishing.
Using pre-finished hardwood can reduce the need for sanding, but if you’re working with raw wood, sanding is nearly unavoidable. Trying to fix sanding mistakes later often costs more time and money than doing it right initially.
Before you start, consider the tools and skills you need for sanding. It’s a messy, physical job but important for a quality finish. Many who skip sanding end up frustrated with the final look of their hardwood floors. For more details, see experiences shared about installing hardwood floors without professional help.
Building a playhouse without considering weatherproofing
When you start building a playhouse, it’s easy to focus on fun design ideas and forget about weatherproofing. But ignoring this can lead to problems like water damage, mold, and a shorter lifespan for the structure.
You want your child’s playhouse to stay safe and dry, no matter the season. Adding proper sealing, roofing materials, and drainage helps keep the inside cozy and protected from rain or snow.
Using treated wood or applying a waterproof sealant can make a big difference. Also, think about ventilation to prevent humidity buildup while still keeping out the elements.
If you don’t plan for weatherproofing, you might find yourself fixing leaks or replacing parts sooner than expected. Taking the time upfront saves you frustration and extra costs later on.
For basics on framing and roofing that hold up to weather, checking a detailed guide like this one on framing, foundation, and roofing can help you prepare properly.
Painting over textured walls without proper prep
If you skip prepping textured walls before painting, your new paint might not stick well. The texture can cause uneven coverage and a rough finish that looks worse than before.
You might think painting right over the texture saves time, but it often leads to peeling or chipping paint. Proper prep, like cleaning and priming, helps the paint adhere better and last longer.
To get a smooth result, you can apply a skim coat to fill in the texture. This step makes your wall ready for paint and avoids a bumpy surface.
Using the right roller matters too. A thick nap roller covers textured surfaces better than a standard one, helping you avoid missed spots or streaks.
Taking time to prep means your paint job will look fresher and hold up. Otherwise, you might end up needing to repaint or fix the walls sooner than you expected. For more tips, check out advice on painting over textured walls.
Tiling a backsplash with uneven grout lines
If you’re tiling a backsplash, uneven grout lines can quickly become frustrating. It often happens if tile spacers aren’t used or if tiles aren’t placed consistently. This can make the whole backsplash look less polished, even if the tiles themselves are nice.
To avoid this, make sure your surface is flat before you start. Use tile spacers to keep grout lines even and consistent. Press the grout firmly into the lines, then use the edge of a float at a 45-degree angle to smooth it out. This helps prevent gaps and unevenness.
If you skip spacers or move too quickly, you might end up with crooked tiles and grout lines that vary in thickness. This is a common regret shared by many DIYers who tried tile installation for the first time.
Taking your time and carefully following a step-by-step guide can save you headaches later. Watching someone else’s DIY experience with backsplash tiling can also help you avoid common errors others have made. You can find useful tips and real stories about this on Reddit or in video tutorials like this budget-friendly zellige tile project.
Replacing kitchen cabinets solo without measurements
Taking on cabinet replacement by yourself can seem doable, but skipping measurements is a common mistake. Without accurate sizing, your new cabinets might not fit properly, leading to gaps or forced adjustments.
You might think you can guess the space, but walls and corners are rarely perfectly square. This can cause frustration when you try to install cabinets that don’t line up.
If you decide to proceed, remove the old cabinets carefully. Often they are just screwed into the wall, making the removal straightforward. Still, expect to spend extra time adjusting the new cabinets to fit the existing space.
Trying this on your own could work if you have some basic tools and patience. For tips on removing and rehanging cabinets, check out guides like this one on how to take down kitchen cabinets and rehang them.
Attempting complex electrical fixes without experience
Tinkering with electrical work might seem tempting when you want to save money or feel handy. But without proper experience, it can quickly become overwhelming and even dangerous.
Small tasks like changing lightbulbs or installing smart doorbells are usually manageable. However, complex fixes like rewiring or installing new circuits require skills and knowledge to avoid hazards.
If you jump into complicated electrical projects, you might end up causing more damage or creating safety risks. It’s common for parents to regret starting these tasks because the time and stress involved often exceed expectations.
Knowing when to call a professional can save you frustration and help protect your home. Remember, some things are better left to experts, especially when they involve electricity. For a clearer idea of what not to attempt yourself, you can check out advice on electrical projects to leave to pros.
Repainting old furniture without stripping finish
If you want to freshen up old furniture without the hassle of sanding or stripping, it’s possible. You can use a product called a deglosser, which helps dull the existing finish so new paint will stick better.
Applying a deglosser is quick and less messy than sanding. After wiping your furniture with it, let the surface dry completely before painting. This prepares your piece without damaging the wood beneath.
Keep in mind, while skipping sanding saves time, lightly roughening the surface still helps paint adhere better. Using fine grit sandpaper just to scuff the finish is a good compromise if you want smooth results.
Choosing the right paint is important too. Look for paints made for furniture or ones labeled as bonding paint. They are designed to stick to glossy or finished surfaces without extra preparation.
If you want more ideas or step-by-step guidance, check out how to refinish wood furniture without stripping or sanding on madewithgraceandgrit.com or watch a quick walkthrough like the one on YouTube.
Trying to fix roof leaks without proper tools
If you try to fix roof leaks without the right tools, you might end up making the problem worse. Using makeshift materials or common household items often won’t hold up against weather conditions.
Proper gear like roofing adhesive, caulk, and chalk lines helps you find and seal leaks accurately. Without them, you might miss the exact spot or create patchy fixes that don’t last.
Working alone can also be risky on a roof. Having someone with you makes the task safer and easier.
If you want to learn simple methods and tools for roof repair, you can find helpful tips in a detailed DIY roof repair guide. Taking time to prepare with the right materials will save you frustration and keep your home dry.
DIY deck staining that leads to uneven color
When you stain your deck, uneven color is a common problem, especially if the wood is old or weathered. The finish can look blotchy or have lap marks where stain overlaps. This happens because the wood absorbs the stain unevenly.
If you use an oil-based stain, expect some variation in color. Treated wood often repels moisture, causing inconsistent results when applying stain. Sanding can help, but it may not completely fix the unevenness.
Rushing the process or applying too much stain at once can make the problem worse. It’s important to work in small sections and maintain a wet edge while staining. Otherwise, you’ll see visible lines where the stain dried before blending.
Some people regret tackling this because it takes more time and effort than expected. If you want to see a complete project done right, check out this DIY Deck Staining video for helpful tips.
Remember, patience and preparation are key to a more even finish, but even then, some shades of unevenness may remain.
Installing DIY lighting without safe wiring
Trying to install lighting without proper wiring can quickly lead to frustration. If your home’s wiring isn’t up to code or is non-standard, it’s easy to make mistakes that could cause electrical problems.
You might think a quick fix, like using plug-in lights or battery-operated fixtures, will work. While these can be safer alternatives, attempting to hardwire lights without the right skills increases risk.
If you pull off old fixtures and find a mess of tangled or outdated wires, consider calling a professional. It’s common for older homes to have wiring that isn’t compatible with new lighting.
You can explore options to add lights without hard wiring using simple DIY methods, such as plug-in or adhesive lights. These solutions avoid the need to touch your home’s electrical system.
For more ideas on easy or risky lighting projects, check out what others say about DIY lighting without outlets or hard wiring. This way, you avoid headaches and keep yourself safe while brightening your space.
Constructing built-in shelves that aren’t level
When you build built-in shelves, it’s crucial to make sure they are level. If your shelves aren’t even, it can cause items to slide or look crooked, which is frustrating to fix later. Simple tools like a spirit level can help you check as you go.
You might think small errors won’t matter, but even slight unevenness can become very noticeable over time. This can also affect how the shelves attach to the wall, potentially making the whole unit less stable.
If you’re new to DIY, it helps to measure multiple times and mark clearly where each shelf should go. Sometimes walls and floors aren’t perfectly straight, so you may have to adjust to that unevenness rather than trying to force everything perfectly square.
Using sturdy supports and properly sized screws, like 2 ½ inch wood screws, can keep your shelves secure even if surfaces are imperfect. For some guidance on materials and supports, you might find helpful tips for built-in shelving at thelakeandtheland.com. This helps you avoid a wobbly finished product that ends up causing more headaches than it’s worth.
Retiling a shower floor without proper waterproofing
If you skip waterproofing when retiling your shower floor, you might think you’re saving time and effort. But moisture can seep through tiny gaps and damage the subfloor over time. This often leads to mold, mildew, and costly repairs later on.
You might be tempted to just tile over the existing floor. While that sounds easier, it won’t solve underlying waterproofing issues. Proper waterproofing acts as a barrier to keep water contained and protect your walls and floor.
Some people say waterproof membranes aren’t always necessary if you install everything perfectly. But in reality, even small mistakes in sealing can cause leaks. Taking the time to waterproof helps avoid headaches and extends the life of your shower.
If you’re unsure how to waterproof correctly before retiling, consult guides or professionals. It’s better to spend extra effort now than to deal with water damage in the future. For more tips on shower floor retile basics, check out this detailed guide.
Replacing windows without professional help
If you decide to replace your windows on your own, be prepared for some tricky moments. Handling glass is delicate work, and one wrong move can lead to shattered panes or injury.
You might underestimate how much precise measuring and fitting is required. Even a slight misalignment can cause drafts or leaks, costing you more in the long run.
Make sure to protect your workspace well. Not taping the glass before removal can lead to broken shards everywhere, which is a common regret shared by DIYers.
Consider potential hidden hazards like lead paint or asbestos, especially in older homes. These can pose health risks if not handled properly during window removal.
If you want to learn more about the risks and benefits, check out this detailed guide on the pros and cons of DIY window replacement.
In many cases, hiring a professional can save you time, money, and stress. But if you do take the plunge yourself, plan carefully and prioritize safety at every step.
Installing bathroom vanities with awkward plumbing
When you start installing a bathroom vanity, you might not realize how tricky the plumbing can be. Pipes that don’t line up properly often create extra work. You may find yourself cutting or adjusting connections just to make everything fit.
If the plumbing is awkwardly placed, it can make your vanity installation take much longer than expected. You might have to remove parts multiple times or even buy special fittings. This can lead to frustration if you’re not prepared for the extra effort.
Sometimes, the drain pipes don’t match standard sizes or locations. That can mean more trips to the hardware store and guessing which solution will work. If you don’t have plumbing experience, this part can become overwhelming quickly.
Doing your own installation saves money, but plumbing issues can eat up your time. Watching tutorials or checking tips for common problems can help. For tips on how toilets and sinks are often installed incorrectly, you can find good advice in videos like this easiest bathroom vanity install guide.